
With the rise of self-custody and peer-to-peer crypto usage, understanding how to track transactions on blockchain explorers like Etherscan and Solscan has become a fundamental skill. These tools allow users to verify payments, check wallet balances, trace token movements, and avoid scams in real-time.
Whether you’re a crypto trader, NFT collector, or DeFi user, this guide will show you,step by step,how to read and interpret blockchain transactions clearly and confidently.
What Are Etherscan and Solscan?
Etherscan (for Ethereum) and Solscan (for Solana) are public blockchain explorers. They allow anyone to search and view all historical and live activity on the blockchain,wallets, token transfers, smart contract interactions, gas fees, and more.
Think of them like a bank statement,but fully transparent, pseudonymous, and decentralised.
Why It Matters:
- You can verify if a payment was sent or received.
- You can detect suspicious activity on your wallet.
- You can trace NFT drops or token movements.
- You can avoid scams by checking if a token is legit.
How to Read a Wallet on Etherscan
Step 1: Go to etherscan.io
Step 2: Paste the wallet address in the search bar. This can be your own address, or someone else’s (public data).
Once loaded, you’ll see:
- ETH Balance – shows the total Ether in the wallet.
- Token Holdings – a list of all ERC-20 tokens held.
- Transaction History – list of all wallet activities.

Step 3: Click on a transaction to reveal:
- Transaction Hash – unique identifier.
- Block – which block the transaction was confirmed in.
- Timestamp – when it occurred.
- From / To Addresses – sender and receiver.
- Value – amount of ETH or token.
- Transaction Fee – gas used × gas price.
- Status – success or fail.

Example: You send 0.1 ETH to a friend. You’ll see that amount deducted from your address and reflected in theirs.
How to Read a Wallet on Solscan
Step 1: Visit solscan.io
Step 2: Enter your Solana wallet address in the search bar.
The wallet page shows:
- SOL Balance – total SOL held.
- SPL Tokens – list of non-native tokens (e.g., USDC, BONK).
- Transactions List – every action recorded.

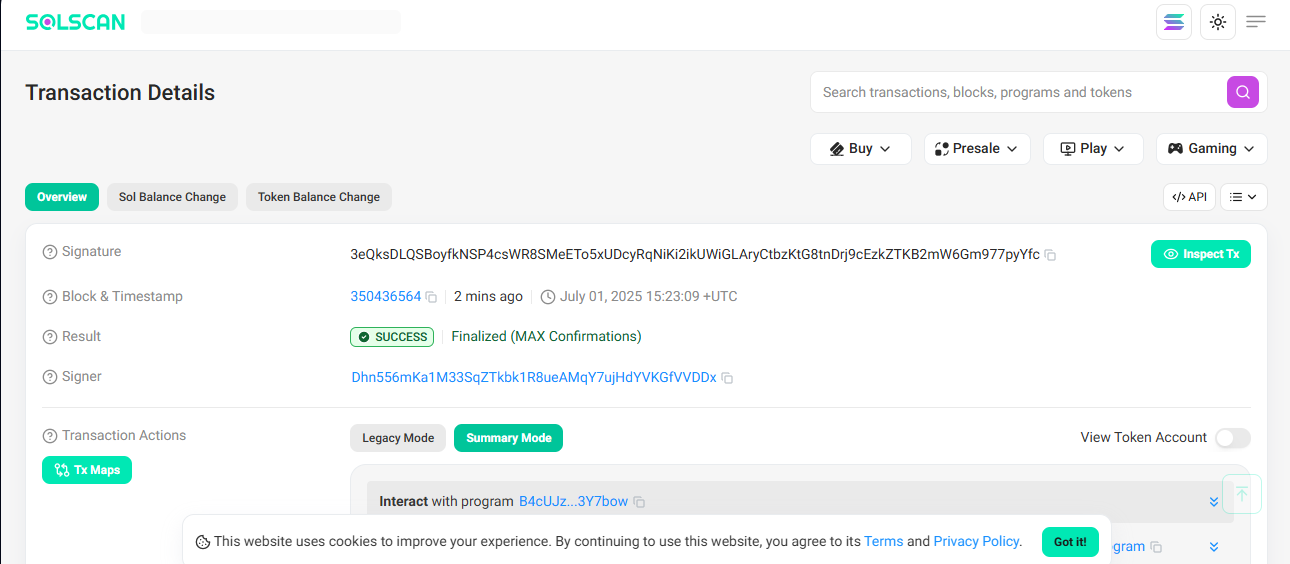
Step 3: Click on a transaction to inspect:
- Type – transfer, contract call, stake, etc.
- Slot & Block Info – position on the chain.
- Fee – amount paid in SOL.
- Signer – which wallet initiated it.
- Instruction Data – technical actions processed.
Example: You stake SOL on Marinade Finance. The transaction will show Stake as the type, and the staking program under Instruction.
Real-World Example: Verifying a Payment
Let’s say a freelancer received USDT on Ethereum.
- Go to Etherscan
- Paste the wallet address
- Find the latest transaction under the ERC-20 Token Txns tab
- Click it and confirm:
- Token: USDT
- From: Client’s wallet
- To: Freelancer’s wallet
- Status: Success
Now you can prove payment without needing screenshots or trusting third-party apps.
Spotting Red Flags in Transactions
Explorers can reveal shady activity:
- Tokens with zero holders = suspicious
- Names that mimic real tokens (e.g., USDT v2) = scam
- Unusual approvals = wallet may be compromised
Always verify before signing any contract or interacting with unknown tokens.
Extra Tips to Get the Most Out of Explorers
- Wallet Labels: Some wallets are tagged (e.g., Binance Hot Wallet), giving clarity.
- Gas Tracker: Etherscan includes real-time gas prices.
- Token Analytics: View top holders, token supply, and transaction charts.
- Bookmark: Save wallets or contracts you monitor frequently.
Conclusion
Mastering blockchain explorers puts control back in your hands. No more blindly trusting wallets or exchanges. From confirming a deposit to spotting a scam, Etherscan and Solscan are essential tools for any crypto user who wants clarity, security, and independence.
Read also:How to Avoid Common Crypto Scams in Africa and Globally